Quick & Easy Crafts for your ESL Easter Lessons
There are loads great activities you can do in your lessons in the lead up to Easter. On ESL KidStuff we have a lot of Easter games & activities, Easter themed flashcards and worksheets.
Crafts are always popular, kids of all ages love doing them, and they can really liven up your kids lesson. Here are 10 great crafts you can use in your Easter lessons:
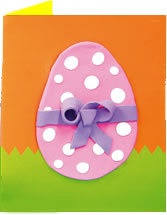 1. Easter egg cards. You can easily make these in class with some construction paper, felt and common craft supplies. Before class, cut out enough card for each student for the actual card. Also, cut out the green grass for each student and different colored oval shapes for the eggs. Finally, cut out strips of felt for the ribbons and small circles to stick on the eggs. In class, have your students glue the felt onto the cards. Older kids can write an Easter message inside the card and for smaller kids you can help them write their own message (even get them to trace over a message written lightly in pencil). A nice idea is to have each student give their card to another student (in an envelope if you can stretch your budget far enough!).
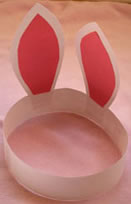 2. Easter bunny ears. This craft will have your students hopping around the classroom acting out being bunnies!
Before class prepare the shapes: cut a strip of card for the headband and two ear shapes (including pink inner ears) per student.
In class, give out the headband strips and ear shapes to your students and let them decorate the headband and ears with crayons, markers, glitter, etc.
Finally, measure the headband on each student’s head and glue or staple in place and glue on the ears.
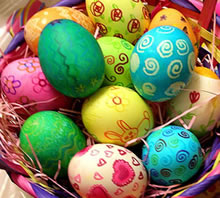 3. Easter egg decoration. Use real egg shells (before class get some eggs, puncture a hole at both ends and blow out the insides of the egg, then wash out).
Use colored felt pens, paint, glue and glitter, stickers and anything else to decorate the eggs.
You can use these eggs in the ‘Easter Egg Blow’ game – use straws to blow the eggs across the classroom – the first across is the winner!
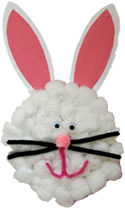 4. Easter rabbit masks. All you need is paper plates, pink or black paper (a small quantity for the nose and ears), cardboard and cotton balls or another soft material.
First cut out oval shapes from the cardboard – this will become your bunny’s ears. Next, cut out the nose from the colored paper. You can also cut triangles of pink paper to make the inside of the bunny’s ear. Cut two holes in the paper plate for eyes. Then paste on the ears, eyes and nose. Paste cotton balls all over the face to make the bunny look soft.
There you have a bunny mask!
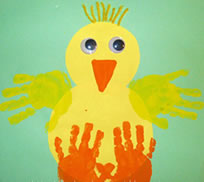 5. Chick hand print craft. This gets messy – more fun for the kids! Before class, cut out two yellow circles per student from construction paper (larger for body, the other for the head). In class, give each student a square sheet of construction paper and circles to glue to the card. Then get the paint out. First, have your students paint the eyes, beak and hair. Finally, let them get their hands covered in paint to print the chick’s hands and feet.
6. Peek-a-boo chick. This super simple craft just needs a clothes peg, card and glitter. Help your students create an egg and chick by cutting out the shapes from card and decorating them. Then cut the egg into two with a zigzag cut. Finally, glue to a clothes peg, as shown in the photo below. Lots of fun!

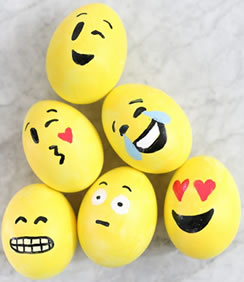 7. Emoji eggs. This is so much fun for students old enough to have cell phones. You’ll need a lot of hard boiled eggs for this (6 per student) so it may be a good idea to ask parents to prepare these for students to bring to class.
At the beginning of the class, have students paint the eggs bright yellow (acrylic paint works well). Then leave to dry – they should be dry by the end of class.
Give out black, red and blue marker pens to your students as well as white out (Tipex) for white parts. Students can use their phones to find emojis to copy onto their eggs. Creative and fun!
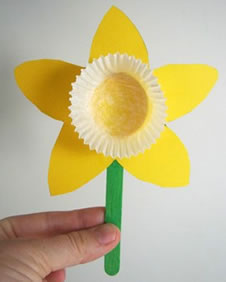 8. Easter flowers decoration. These can be all-yellow to make daffodils, or you can use a variety of colors for a multi-colored decoration. All you need are popsicle sticks (painted green), cupcake casings, colored card, glue and scissors.
Simply have your students cut out the flower shapes from the card, then glue everything together to make the flower. Make lots and fill your classroom with this beautiful decoration.
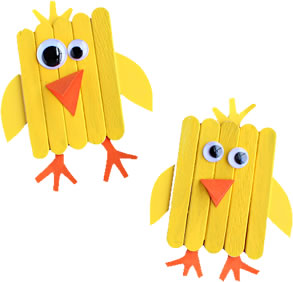 9. Popsicle chicks. For each chick you’ll need 5 popsicle sticks (painted yellow), orange and yellow card, cardboard, 2 craft eyes, scissors and glue.
Glue the yellow popsicle sticks onto a cardboard base and cut around cardboard so you have the shape of the chick. Then cut out some feet, beaks, and wings from the card.
Finally, glue on all the pieces – a really cute decoration!
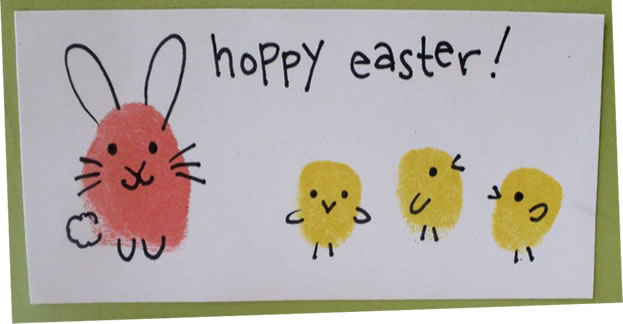
10. Easter fingerprint picture. This is a fun activity to do with your kids. You just need some ink pads, card, pens and fingers!
Have your students press their fingers onto the ink pad and press onto a piece of card or construction paper. Then with a pen draw ears, eyes, noses, whiskers, paws, tails, beaks, wings and feet. Before you know it, you’ve got a great Easter picture!
