Menu
Download the accompanying materials to this lesson plan - sign up here
Resources and materials for ESL Kids teachers
The song in this lesson is a great song for burning up energy so it can be used in any lesson as a warm up, energy burner or even to wake everyone up. There is some useful vocab centered around the directions left, right, forwards, back. This is very much an action-based lesson focusing on the verbs in the song. You’ll need two lengths of rope for this lesson.
See our "Warm Up & Wrap Up" page.
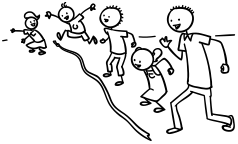
1. Teach left / right
Get a long length of rope and lay it on the floor from the front of the classroom to the back. Stand at the front and to one side of the rope and get everyone to line up behind you, facing forward. Shout "Jump to the left" and jump left over the rope. Get everyone to follow you. Then do the same for the right: "Jump to the right". Do this a few times getting everyone to copy you and shout out "Jump to the left / right". Next, the teacher can leave the line and shout out for the rest of the class to jump left / right over the rope. To make it into a game, sometimes shout out for the side of the rope everyone is already on – in this case everyone must jump but stay on the correct side of the rope.
2. Teach forward / back
Now move the rope so it goes across the classroom, left to right. Stand behind the rope with everyone in line with you. Shout "Jump forward" and jump over the rope, with everyone copying you. Next, shout "Jump back". Continue in the same way as with point 1 above.
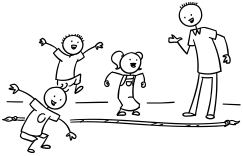
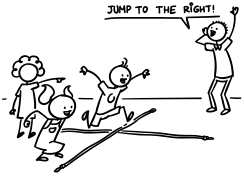 3. Practice left / right / forward / back
Put a second length of rope from the front to the back of the classroom, so with the two ropes it forms a large "+" in the room. Get everyone to start front, left. Shout out instructions (e.g."Jump to the right", "Jump back", etc.) so that everyone jumps over the ropes. Start off slowly and then get faster and faster.
4. Left / right / forward / back pair activity
Put the students into pairs. If you have hula-hoops use can use them but if not they aren’t necessary. Demonstrate to the class with one student. Tell the student to stand in the hula-hoop (or just in some space). Say to the student "Jump forward" and the student must do that. Then Say another action (e.g. "Jump to the right"). Continue giving instructions so the student jumps around the space in the hula-hoop (or just in the space in the room). Now, get your pairs to do the activity, with one student shouting out instructions to his/her partner. After a while, get the pairs to change.
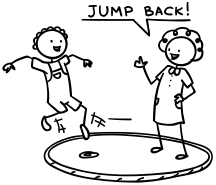
5. Practice the verbs of the song
Stand everyone in front of you. Say the first verb and dothe action (e.g. "turn around"). Get everyone to follow you. Continue through all of the verbs and repeat a few times so that everyone knows the actions. You can also put the song sheet on the board so everyone can see the actions.
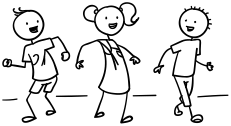
6. Sing "The Directions Song"
Now that everyone has got the idea of the actions for the song they should be ready. The song is pretty fast so make sure everyone is ready. The teacher should also do the actions of the song and sing along so to encourage everyone to follow. Play the song through the first time and just focus on getting the actions right. After that play the song a couple more times and encourage everyone to sing as well. You can play this song each week – it will become a class favorite!
Lyrics for "The Directions Song"
Are you ready?
Chorus:
Jump to the left,
Jump to the right,
Jump forward,
And jump back.
Jump to the left,
Jump to the right,
Jump forward,
And jump back.
Verse 1:
Turn around and touch the ground,
Turn to the left and turn to the right.
Turn around and touch the ground,
Turn to the left and turn to the right.
Chorus
Verse 2:
Sit down and stand up,
Jump up and down and clap your hands.
Sit down and stand up,
Jump up and down and clap your hands.
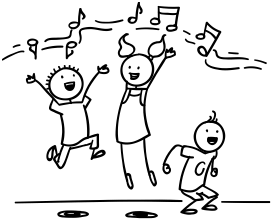
Gestures for "The Directions Song"
The actions are very simple: as you sing along do the actions of the song.
We also have a video that you can stream in class to sing along with (Internet connection required):
7. Read classroom reader "Are you Ready? Let's Go!"
Before class, download and print off the reader "Are you Ready? Let's Go!". As you go through each page, point to the pictures, elicit the actions and have everyone copy the actions:
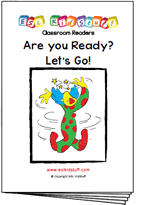 Teacher: (pointing to the picture of the clown on page 2 and reading) "Stand up ..." What is he doing?
Students: Clap!
Teacher: Yes, that's right! (Reading) "... and clap 6 times". Ok, everybody stand up and clap 6 times. Are you ready? Let's go!
(Students stand up and clap)
Get the students really involved in the story by joining in with the actions. You can even get single students to do different actions (giving lots of praise when correctly doing the actions).
After reading the story, give out a reader worksheet to each student and read through the story one more time (without stopping for questions, etc.) as students complete the table. Then go through the answers as a class.
---
Alternatively, watch our video version of the reader (Internet connection required):
8. Play "Pin the Tail to the Donkey"
To finish the lesson we'll play a fun game - one that is a really popular party game. You'll need a blindfold and large picture of a donkey or alternatively, draw one on the board. In fact, it doesn't even need to be a donkey - it can be any animal with a tail (cat, dog, monkey, etc.). If using a picture, cut the animal out and then cut out the tail. The tail needs to have a something sticky attached to it, such as blu-tak, so it can be stuck onto the picture.
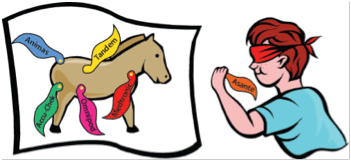
Students are then blindfolded and the rest of the class give him/her directions which way to go - left, right, up or down. The winning student is the one that places the tail closes to the correct position.
1. Assign Homework: "Left Right Color" worksheet.
2. Wrap up the lesson with some ideas from our "Warm Up & Wrap Up" page.
 Found a mistake?
Please let us know
Full access to all resources on ESL KidStuff including lesson plans, flashcards, worksheets, craft sheets,
song downloads, classroom readers, flashcards app and songs app.